![]()
Promoting the Bagpipe Revival since 1986
The Bagpipe Society
Making a Bagpipe
Long ago when I decided I’d like to make myself a set of pipes I had no idea how to go about it. There were only a couple of books on the subject; Wilbert Garvin’s crash course in uilleann pipe making and Cocks and Bryan. Garvin is still worth getting although it was out of print for a few decades and became quite sought after. These days we are only a click away from a video of pretty much any part of the process but it has to said that it’s not all good practice. The chatrooms are useful but swamped with diverse opinions and conversations flying off at tangents. I don’t imagine it’s at all easy for the beginner to put it all together. So, in this article I’d like to give a brief guide to how I make pipes. I’ll leave you to surf for plans and courses on wood turning etc.
The best advice I can give the budding pipe maker is, practise your pipes and look to your reeds. Don’t spend evening after evening down in the shed crafting a thing of beauty whilst putting off thinking about reeds later. It’s a bit of a chicken and egg thing and I know you have to start somewhere but make that place the chanter reed. Ideally, teach yourself to reed an existing chanter that you already have a good reed for. That way you’re not working entirely in the dark as you have a reed to copy. Be wary though of taking the thing to bits to measure it! I know of a well-known uilleann piper who let a friend rebuild their reed only to find it was never the same again. It can be done and I happily pull my reed apart but I’ve had a lot of practice putting them back together.
My first sets of pipes were built around a single working chanter reed and I learnt a lot from the process. The down side was that I couldn’t replicate the reed as I hadn’t made it. It may seem odd but it’s far easier to make two identical chanters than two identical reeds. The reed is the dynamic part of the instrument whose job is to excite the harmonics in the static bore. In doing so it opens and closes as many as a thousand times a second. As a result, how its construction influences its motion and interaction with the acoustical standing wave on the bore is hard to picture. Some stability, tuning and tone issues are adjusted in the reed and some in the woodwork of the chanter. Where to start when addressing such things usually comes down to experimentation. I guess trial and error eventually becomes experience but it’s a never ending loop as you strive to make chanters more stable, in tune and sonorous. Making a chanter sometimes feels like a manufacturing process but, in my experience making a reed always feels like research and development. Expect to spend a lot more time on the reeds than on the chanter, at least with your first few instruments.
EQUIPMENT
The most important machine you are going to need is undoubtedly a lathe. Given that you are going to spend many an hour at the lathe, it’s worth getting a machine that doesn’t shake its bolts loose every time it starts up or is cumbersome to adjust. It doesn’t have to be a top flight machine but it will need to have a headstock chuck and quite a deal of tooling. I still enjoy turning and it’s a joy to work on a good lathe but you can still make pipes on a mid-range machine. If you’re looking for a used lathe, I would recommend you buy one that comes with all the tool, centres and chucks. Picking these up piecemeal is much more expensive. I also have an engineering lathe that I use to make metal ferrules and tools. Some makers do everything on a single such machine but I find a wood lathe gives me more freedom when creating curves and decoration.
A bandsaw is really a necessity; a cheap one will do and is going to be a thousand times better than a hand saw. Other than that it can be all hand tools. I do have a leather sewing machine I wouldn’t be without but I think most makers hand sew their bags.
Long hole boring drills and long taper reamers are a specialism of pipe making. You can make your own which I think is the norm, especially for chanter reamers. More on that later.
REEDS
The reed has to be a precise acoustic fit with the chanter. Mouth blown reed instruments like oboes and clarinets are much more forgiving as the player adjusts the pressure on the reed to suit the note being played. A poor reed is hence forced to perform even if it may be reluctant and produce a poor tone. A bagpipe reed, on the other hand, has to look out for itself. If it’s unhappy playing a particular note it lets the world know about it. It’s a wonder that it’s possible to get one to play so many different notes and no surprise when it doesn’t quite manage them all.
There is an increasing amount on the web on the subject of reed making and for all sorts of pipes. See the book list at the end for the books I’ve found.
Cane or plastic? Some pipes only work with cane reeds. It’s not just a tone thing, some fingerings just aren’t stable. Cane, of course, is sensitive to moisture and changes its shape as moisture from your breath diffuses in. You also have to start with the right outside diameter unlike with plastics which can be bent or moulded into shape. The basic rules of reed making apply to both, it’s just the making process that’s different.
Here are some basic rules for chanter reeds not in all the books –
Reeds have to be air tight, even down their edges.
The gap at the tip is critical. Experiment with it between bouts of scraping. A more open reed will require higher pressure and play louder. It has more internal volume and this flattens it.
An open, high pressure reed also has more command over the chanter than a closed one.
Symmetry is very important, asymmetric reeds can work well but aren’t easily replicated and look rubbish.
Suck on the staple of a good reed and listen carefully to the crow. If the crow of your new reed isn’t at the same pitch it won’t just play at a different pitch, it may not work at all.
The stiffness of the blades is determined by the curve as well as the thickness.
Everything affects everything else. Almost certainly not true, it just feels that way.
There is plenty on the web about drone reeds especially relating to highland pipes. They’re not difficult to make given you have a lathe to bore out and turn the body. They can also have brass bodies like many Northumbrian smallpipe reeds. See Colin Ross’ book. The blades can be anything from spruce to plastic ice cream carton and are easily discarded and re-made.
CHOICE OF WOOD
Some sets of pipes are cherished, given names and always carefully dried and put to bed after playing. Some are workhouses and go straight back in the case with sundry other instruments. The former will survive for posterity pretty much regardless of what they’re made of. The latter need to be highly water tolerant and abrasion resistant to stand any chance of survival. What then is the best wood to use? The easy answer is something that’s going to sound nice, look good and be long lived. Historically box and plum have always been high on the list but they can be expensive. Also avoid anything that doesn’t turn easily, so maybe consider other fruit woods such as pear and apple. Maple also ticks the boxes and can be bought in nice straight seasoned boards. Whatever it is it’s going to need to be well seasoned. As wood dries it shrinks, but not evenly in all directions. Uneven shrinkage turns perfect cylinders oval, making the joints loose and leaky.
More interesting timbers can be hard to get in large boards. Buying them as a bunch of squares (pre-cut long square sections) is cost effective but they may not all be the same colour. Be aware that some of these species are only suitable for bellows pipes and fall to bits if your make mouth blown pipes out of them.
When asked which timber will produce the best sounding set of pipes my standard response is thus: If you compare identical chanters made from the usual woods using the same reed you will hear a difference. Alternatively, if you take a bunch of “identical” reeds and compare them in a single chanter you will also find considerable variation in tone. Often the variation between reeds will be greater than that between chanters. To quote an old adage, the three most important things are the reed, the reed and the reed.
BORING
A common mistake is to painstakingly turn the outside of your first chanter only to be told that you should have bored it out first. The problem is of course that long holes are rarely straight even with made with the most expensive drills. The length of the holes we have to drill also dictates that we rotate the work on the lathe and hold the drill static in the tail stock. Why? Well imagine a 5mm drill half a meter long drill whipping round at a couple of thousand revs. The spinning wood needs to be held in a chuck and often as not, supported at the free end by a steady. The steady is one of those things makers typically make for themselves. I’ve made several over the years. The most useful has inline skate wheels supporting the work. You will find several designs on the web.
The secret to drilling straight is, unsurprisingly, to start straight and keep the drill sharp. You also need to use the right sort of drill. Take a look at the tip of a twist bit. It has a chisel point in the middle and then two cutting edges. The chisel point has to push wood out of the way and the cutting edges pull the drill into the work. It is hence influenced by the grain of the wood it’s drilling into. To drill straight, the cutting edge has to be extended across to the middle of the bit and the cutting angle (rake) has to be zero, a flat scrape. Generally referred to as a D bit, the D being the shape of the tip when viewed end on. You can regrind a twist bit like this, keeping just one cutting edge and removing the other. Soldering it onto the end of a steel rod gives you a handy long hole drill that holds the shavings in the spiral flutes as you withdraw it. There are other solutions of course, the best being gundrills - but they’re not cheap.
With drones, the norm is to drill straight through and then mount the work on the ends of the bore to turn the outside. Chanters need care. A slight curve in a drone isn’t a problem but chanters have to be straight. If not, the reamer may not cut perfectly true which can affect the finger hole depth. This may seem incidental but we ask so much of chanters. The stability of many notes is affected by the subtleties of bore and finger hole dimensions. When you’re making a final copy of your much reworked prototype, any variation will drive you mad when it comes to reeding it.
When the chanter has cross fingerings and a second register, a single finger hole can serve multiple functions. A hole over which you cross finger is effectively responsible for stabilizing and tuning two notes. The same is true with a second register, the hole having to be sized for both octaves. The situation is worse still on uilleann pipes where you have to tune for two octaves and three fingerings: half closed, covered (or tight) and off the knee. A high level of repeatability whilst making the chanter is hence essential.
Conical chanters need to be step drilled so the reamer doesn’t have too much work to do. There are several ways of tackling this. I start with the largest drill and gradually work down to the smallest obviously going deeper and deeper. I used to start by pushing the smallest drill right through, re-centre and then opening out with larger and larger drills. There are pros and cons to each method.
REAMING
If you need a hole to be precise, you need to ream it. First you drill a slightly under size hole and then carefully introduce the reamer. Drone tuning sockets benefit from reaming so they slide smoothly. Stocks are also worth reaming. When oiled during the finishing process the end grain can swell presumably taking up oil. This makes for a loose fit when a chanter or drone is pushed fully home.
Conical bores need conical reamers. You can get away with careful step drilling and some early instruments have clearly been made this way. The complication with using a reamer is that you have to make it yourself, or spend a lot of money.
Making reamers is a whole business in its self. My first were flat reamers painstakingly ground out of old files. They are bomb proof and will last for ever, especially as I don’t use them anymore. Perfectly functional flat reamers can actually be made from mild steel as long as they are sharpened regularly. But then, how often will you be reaming a chanter. One problem with them is that the bores they produce aren’t simply the shape of the reamer, you have to consider their thickness. Also, they can twist in use as bagpipe chanters can be very narrow in the throat below the reed socket. If you have an engineering lathe it may be easier to make a conical reamer. There are several ways to do this. I usually start by step turning and then filing the corners off. The resultant cone then needs a cutting edge. Again, choose your approach. I cut the cone lengthways and then use a bench grinder to finish the cut surface. Like the long hole drill, what you are after is a D section just deeper than the radius with its cutting edge. Burnishing the edge can provide some clearance giving a better cut. It’s slow work and getting a good continuous cutting edge is a bit of an art but what you gain is control of the final bore profile.
I ream long tapered bores by slowly rotating the reamer in the lathe and carefully sliding the step drilled work onto it. It has to be said that there are safer ways of doing this. The work often jams and spins with the reamer and I certainly don’t want to get tangled up in what is affectively a two foot long sword I just sharpened! Waxing the back of the reamer helps by lubricating the cut but I still only run the lathe very slowly. I don’t think the slowest speed on most wood lathes is sufficient for this approach and it’s probably better to fix the reamer in a vice and rotate by hand. After all, this is the way larger instruments are reamed.
TURNING
I learnt to turn from a book with the sole intention of making pipes. Obviously I needed practise before embarking on my first set. The main problem for the beginner is that many parts are long and hollow. As soon as you offer a tool up to this kind of work it starts to whirl round bouncing off the chisel and creating chatter. The solution is to stay sharp and support the spinning wood with your free hand. It takes practise. I often spray silicone lubricant onto the supporting hand to reduce friction and stop it melting. In the past I’ve used a homemade traveling steady and the like for this but I can’t recommend them. Turning can take quite a while to learn and is something pipe makers get very good at.
Decorative detail like beads and coves can be cut using different tools both cutting and scraping. Again practise is the key as is getting a good finish. Do lots of turning and make all those useful craft stall items like honey dippers, dibbers and burr bowls.
FINISHING
I always think when you’ve finished a quality piece of work it should look like you bought it not made it yourself, if that makes any sense. To this end, you need to get a very high finish and remove any sign that it was ever on the lathe. Working through the grits with abrasives is the only way, there are no shortcuts. When pipe makers get together, it seems there is always some discussion of abrasives.
Most woods are porous and need sealing to make them air tight. You wouldn’t think that the imperceptible air flow through the tiny vessels in the walls of a chanter would affect its playing performance but it does. As ever, there is no one right way to go about this. Most people use oils soaked or vacuumed into the wood. Some oils dry (polymerise) and some like mineral oil and almond oil don’t. The drying oils are based on linseed and tung nut and frequently have drying accelerators added to them. I believe boiled linseed oil falls into this category. I use Danish oil on everything except ebony, vacuum impregnating it deep into the wood. I know others have used epoxy and cyanoacrylate.
LEATHER
The most important thing about the bag is that it stays airtight. The favourite is cow hide destined for the upholstery trade. You can suck on a hide and immediately tell if it’s air tight. Be warned, the taste left in your mouth after searching through a stack of hides can be terrible!
You will find that the majority of the airtight hides will be corrected. This means that the outer layer has been ground away to remove blemishes and replaced with pigments and polymers. It’s these compounds that make them airtight. The alternative is a full grain hide. These, the tanner identified to be of sufficient quality to need no correction, but they can be difficult to make airtight. Be wary with corrected hides, they are not all made equal. Bags stretch over time so a corrected surface needs to stretch too. At least to the extent that seasoning/dressing the bag will staunch any porosity. A further constraint is breathability. If the bag can’t dry out, the stocks and reeds suffer and heavily corrected hides are pretty much moisture tight. They can fail when the surface, now on the inside of the bag, eventually delaminates as the bag stretches. Further, we want the suede side to look nice and the leather to be pliable enough to allow the stocks to be tied in. As a result of all these constraints I’ve always found that I have to go to the suppliers to select hides myself. In England most are in around Northampton though the largest, Yarwoods is in Leeds. They all supply a large number of small businesses and are quite used to customers turning up and being picky. That said; don’t expect them to understand why you are sucking on their leather.
BAGS
I machine sew all my bags, it’s a while since I hand stitched one. You need a fairly fancy machine but they make a very good job of the seam. Hand sewing is straight forward and assuming you’re not intent on using a whole goat, the process starts with a pattern. Best cut the holes for the stocks at this stage, I find it more accurate. The seam needs to be stitched through a welt to add strength. Garvins’ book is good on this. The welt is a belt like strip of leather folded over the seam. Many people glue or seal the edges of the bag and or welt before stitching. Minimising leaks is paramount, so aim to make the smallest holes that you can get the thread through. Bags frequently leak through the stitching, especially below the blowpipe where condensation pools and washes any seasoning away. The head of the needle is the biggest thing that needs to go through so use narrow headed needles or something more traditional. The old method was to taper the thread and wax it to a hogs bristle. I have done it this way and it’s a pain attaching the thread, but thereinafter a joy. I had to buy a whole bunch of bristles, so if anyone wants some just ask. I know of at least one maker using a wire loop in place of the needle. The thread itself needs to be strong enough not to break when pulled tight. There’s nothing more annoying.
Holding the bag and welt whilst stitching requires the use of a vice. The best sort is a saddle maker’s wooden clam held between the knees. Mark out the holes with a spiked wheel to keep them even and make the hole with a good sharp awl just wide enough for the needles and use saddle stitch. With a sewing machine you can sew the bag together directly using much smaller stiches. This makes a strong seam that the welt can be glued over, making the stitching airtight.
Once the stocks are tied in, the bag is going to need some sort of seasoning. You could write a whole article on this, and people have. A Gortex liner is another option and solves most of the problems outlined above. They are though a bit of a faff to make and fit.
TYING IN
Don’t even think about seasoning the bag before tying the stocks in. Once you get the stuff on the outside of the bag you won’t be getting it off. Makers have different approaches to tying in. Some even angle the groove in the stock to set the angle of the bass drone. The simplest approach is to make stocks that can be pushed fully into the bag and then partially pulled out. You can use a bit of glue to stop the stock slipping whilst you bind it but it can damage the leather if you take it out. It’s important the leather doesn’t slip. There are at least two ways of actually binding the thread over the leather. I have always use a type of clove hitch called a constrictor knot. With this you put a loop in each end of the thread attaching one to a hook on the bench and pull tight. With the other method you make one loop and put the thread through it as you start binding, see Richard Butler’s NSP manual for more infomation. Both work well and both can look neat.
Tying in the chanter is somewhat different as you have a seam to negotiate. Traditionally small rolls of leather are placed either side of the seam under the binding to pull them in. You may also need a bit of sealant inside the seam if the fit isn’t really tight.
VALVES
Traditionally blowpipes have a leather flap valve but these days the valve is more often made using a vinyl end cap. These look rather like the teat on a baby’s bottle (which would probably work just as well). All you need is a sharp scalpel, a tool I find myself using for something almost every day. The end of the cap is sliced almost through with the uncut section acting as the hinge. It’s then simply pushed onto a tube set in the end of the blowpipe.
Flap valves can be made from rubber and tied onto a metal tab sticking out of the binding. You will find pictures on the web, they work well. I’ve redesigned my valves more than any other part of my pipes. I just hate all that farting and hissing so much.
BOOK LIST
- More Power to Your Elbow. http://lbps.net/lbps/index.php Lots of good stuff in here including reed making for borders and smallpipes.
- The Irish Bagpipes. Wilert Garvin. http://pipers.ie/ How to make a set of uilleann pipes from scratch.
- The Northumbrian Bagpipes W.A. Cocks and J. F. Bryan. Classic book of plans and making info, not sure it’s easy to get hold of.
- Reedmaking for Northumbrian Smallpipes, Scottish Smallpipes and Border Pipes. Colin Ross. A good deal of this is contained in More Power to Your Elbow.
- Making Reeds for Early Wind Instruments. Keith Loraine. No bagpipes but lots on cane reeds.
- Na Piobairi Uilleann. http://pipers.ie/ The Irish piping website has books on reedmaking and plans for uilleann pipes. They also sell cane.
- Les Anches De Cornemuses. ISBN 2-909748-00-6 French language book on cane reedmaking for French pipes.
- Handbook for Northumbrian Smallpipes. Richard Butler. A popular maintenance manual rather than a makers guide but still very useful.
- Precis De Facture D’Anches Renaissance. Jacques Leguy. French and English guide to cane reedmaking.
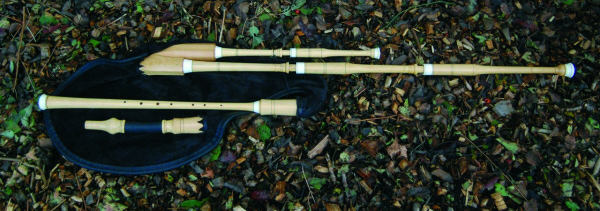
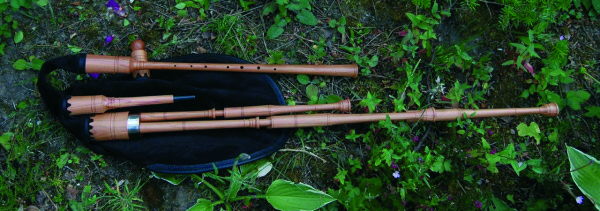
For information about Sean’s instruments, visit his website at http://jonesinstruments.co.uk/
Also, spend 5 minutes sat down with a cup of coffee, and watch a wonderful video about Sean, his pipes and his philosophy towards his vocation. http://bit.ly/Chanter18
- Data Processing Notice (GDPR)
-
 @BagpipeSociety on X
(formally known as Twitter)
@BagpipeSociety on X
(formally known as Twitter)
-
 TheBagpipeSociety on
Instagram
TheBagpipeSociety on
Instagram
-
 BagpipeSociety on Facebook
Something wrong or missing from this page? Let us know!