![]()
Promoting the Bagpipe Revival since 1986
The Bagpipe Society
How long does it take to make a bagpipe?
Any instrument maker is liable to be asked this question and I always find it a tricky one to answer. Where should I start? My pipes are made of wood and I cut down much of it myself which then involves leaving it to season for at least four years. Should my answer disregard this time? In actual fact some of the trees I use were planted by Dad in the 1940’s which was before I was born. It would be deliberately confusing to include the time each tree takes to grow. Once the wood is bored, reamed, turned and polished each piece gets submerged in linseed oil for vacuum and pressure treatment and afterwards I need to leave each piece for at least a month for the oil to dry. Do I include this time in my answer? And what about the hours spent in the office answering emails, doing the accounts, phoning customers, drawing plans, ordering tools, sharpening tools, making new tools, attempting to mend the leak in the workshop roof, putting up yet more shelves, searching for that thing that used to live in its own box, but isn’t there any longer…..? There are a million and one things that can distract a pipemaker from The Primrose Path Of Pipemaking.
In 2010 a group of pipemakers at The Blowout succeeded in making a working bagpipe in a day. We only had one lathe, and we were a Team who were all focussed on getting the job done and inevitably we were all cutting corners. However it was a clear demonstration that, given suitable pieces of wood and leather, and if you omit the oiling process, a bagpipe can be completed in a day.
About three years ago Dirk Dahmer, a commercial photographer from Germany, came to my workshop and took masses of photographs for an article for British Classics magazine. I imagine that practically no one in the UK will be aware of this glossy German magazine, which is entirely devoted to “British Cars, Bikes, ‘Technik’ and Lifestyle”. It’s brimming with articles about Rolls Royces, Daimlers, Jensens, Land Rovers, etc.
When Dirk and his wife visited he was keen to take photos to follow the progress of just one section of bagpipe- from wood to the finished article. I chose to make a Leicestershire smallpipe split stock out of yew wood. If you look at the July/Aug 2017 issue of British Classics you will see over 36 of Dirk’s brilliant photographs and his article entitled TUTEN & BLAZEN. I assume the inclusion of a British pipemaker must have been in the category of “Lifestyle”.
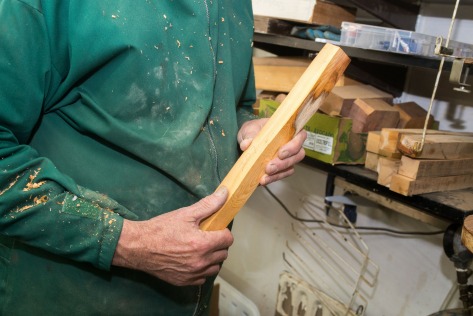
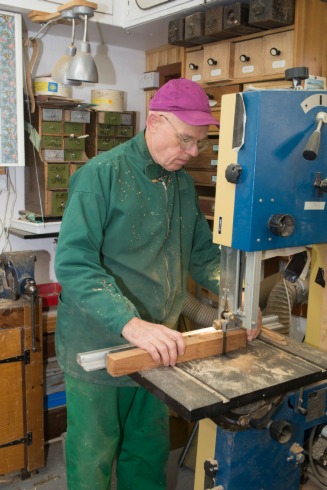
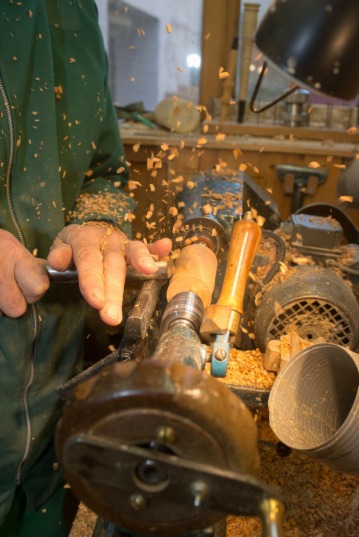
I start with selecting a piece of yew wood, which will have been cut into planks, seasoned for over five years and then cut into billets. (1) It is then cut on the bandsaw to slightly longer than the final length of the stock. (2) I love rough turning on the lathe, working at speed to create an oversized cylinder with large shavings flying all over the shop! (3)
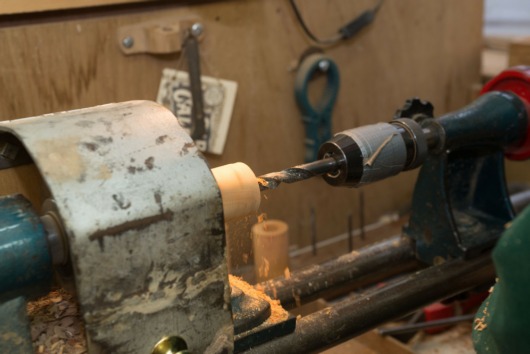
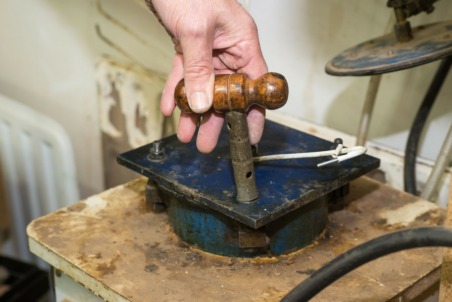
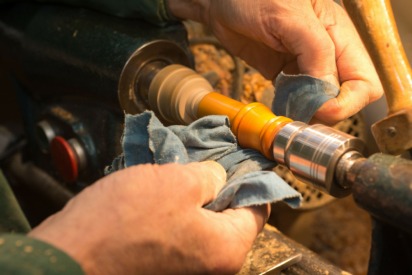
Next is Drilling the bore. Starting with a centre drill, then the ½ inch pilot drill seen in the photo, followed by a 11/16" drill and then the final ¾" drill. After this I turn the ends to reduce it to its final length. (4) With the bored cylinder on the lathe my task is to remove all the unwanted bits of wood to reveal the actual shape of the stock! (5) The critical outside measurement is the 1" parallel section that slides into the bag stock. Once I have turned an initial 1" section I slip on a 1" brass ring which I use as a gauge to check that it is parallel while the lathe is still turning. (6) After it is turned and while it is still on the lathe I sand the stock with progressively finer grades of abrasive and finish the process with ‘T-Cut’a liquid abrasive used to remove scratches on car paint work.
The next stage is the oiling process. The piece is tied onto a piece of wire and submerged in a tank of linseed oil and turpentine.. With a lid on the tank I start the vacuum pump to remove most of the air contained within the dry wood. (7) After a few minutes of vacuum, I can take the lid off the tank and see how the air that was contained in the wood has created froth on the surface of the oil. The next stage is to screw on the pressure lid and to switch on the heater to warm the oil. (8). I then switch on the compressor and once the tank is at the required pressure I turn off the isolation valve, switch off the compressor and leave the wood in the warm oil for a couple of days. (9) It is always exciting to fish a piece out of the tank. I can never predict what it will look like; sometimes the treatment darkens the wood dramatically. (10) The oil stabilises the wood and encourages it to darken over the years.
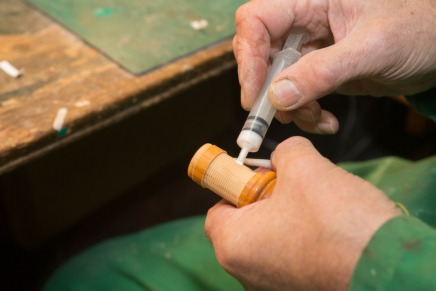
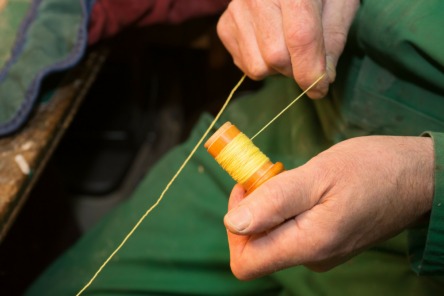
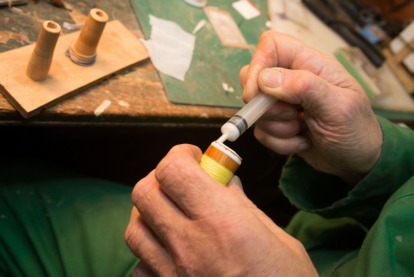
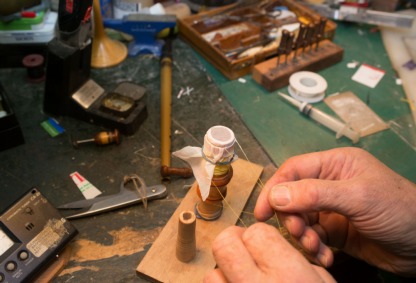
Now I need to leave the stock for a minimum of a month to give the surface oil time to harden. Some woods take much longer than others for the oil to dry. When I am sure that the surface oil has hardened I polish it on the lathe and while it is still rotating I rub some beeswax onto the surface. Buffing most of the wax off with a cloth gives the wood a pleasant sheen. (11) After this I turn the hemp groove and a small groove to hold the end gauze. (12) I then apply a minute amount of PVA to the hemp groove to help anchor the hemp and then the hemp is wound on. (13). Then I apply glue around the gauze groove. (14)
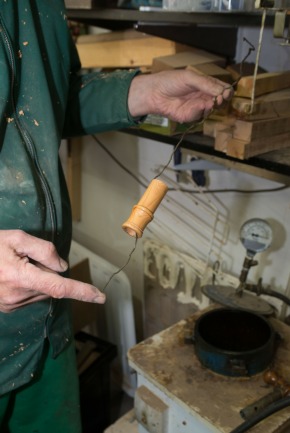
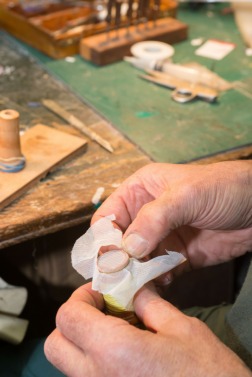
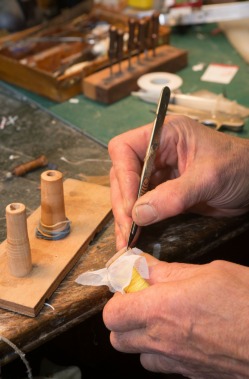
Tying on the end gauze it tricky. A third hand would come in handy! (15)
After about an hour the glue will have dried and I can cut off the surplus gauze. (16) And remove it. (17) And, finally, here is the finished article on a chanter, alongside another one. (18)
It has been quite an ’eye opener’ seeing this sequence of photos! Even though I do all this work myself I never fully focused before on how many processes go into making just one (silent) piece of a bagpipe. Some of these processes take a minute, some take hours, and some take a month or more to complete.
When someone asks me how long it takes to make a bagpipe I sometimes answer by telling them how many I have made in the last 12 months. At the time of writing this article I find that I have made 842 bagpipes during my 34 years of pipe making. That works out to an average of 24.7647 BPY (Bagpipes Per Year). How on earth did we manage to make that bagpipe at the Blowout in just one.
I start with selecting a piece of yew wood, which will have been cut into planks, seasoned for over five years and then cut into billets.
Cutting on the bandsaw to slightly longer than the final length of the stock.
I love rough turning on the lathe, working at speed to create an oversized cylinder with large shavings flying all over the shop!
Drilling the bore. Starting with a centre drill, then the ½ inch pilot drill seen in the photo, followed by a 11/16" drill and then the final ¾" drill. After this I turn the ends to reduce it to its final length.
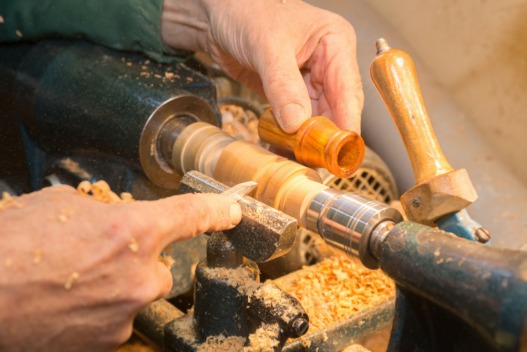
With the bored cylinder on the lathe my task is to remove all the unwanted bits of wood to reveal the actual shape of the stock!
The critical outside measurement is the 1" parallel section that slides into the bag stock. Once I have turned an initial 1" section I slip on a 1" brass ring which I use as a gauge to check that it is parallel while the lathe is still turning.
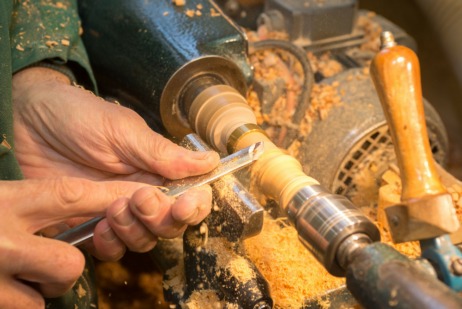
After it is turned and while it is still on the lathe I sand the stock with progressively finer grades of abrasive and finish the process with ‘T-Cut’- a liquid abrasive used to remove scratches on car paint work.
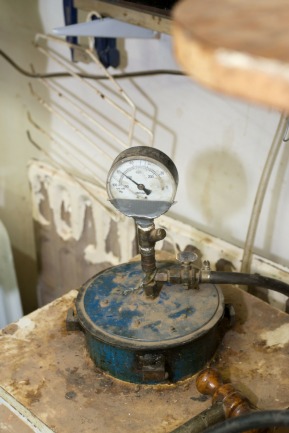
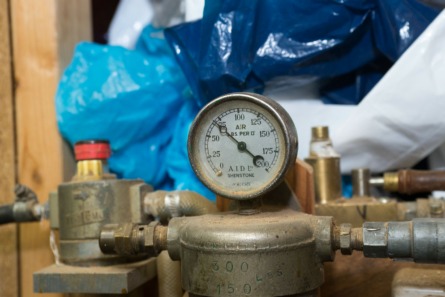
The next stage is the oiling process. The piece is tied onto a piece of wire and submerged in a tank of linseed oil and turpentine.
With a lid on the tank I start the vacuum pump to remove most of the air contained within the dry wood.
After a few minutes of vacuum, I can take the lid off the tank and see how the air that was contained in the wood has created froth on the surface of the oil.
The next stage is to screw on the pressure lid and to switch on the heater to warm the oil.
I switch on the compressor.
Once the tank is at the required pressure I turn off the isolation valve, switch off the compressor and leave the wood in the warm oil for a couple of days.
It is always exciting to fish a piece out of the tank. I can never predict what it will look like; sometimes the treatment darkens the wood dramatically. The oil stabilises the wood and encourages it to darken over the years.
Now I need to leave the stock for a minimum of a month to give the surface oil time to harden. Some woods take much longer than others for the oil to dry.
When I am sure that the surface oil has hardened I polish it on the lathe and while it is still rotating I rub some beeswax onto the surface.
DSC-4650
Buffing most of the wax off with a cloth gives the wood a pleasant sheen. After this I turn the hemp groove and a small groove to hold the end gauze.
I apply a minute amount of PVA to the hemp groove to help anchor the hemp.
And then wind on the hemp.
Then I apply glue around the gauze groove.
Tying on the end gauze it tricky. A third hand would come in handy!
After about an hour the glue will have dried and I can cut off the surplus gauze.
And remove it.
And here is the finished article on a chanter, along side another one.
It has been quite an ’eye opener’ seeing this sequence of photos! Even though I do all this work myself I never fully focussed before on how many processes go into making just one (silent) piece of a bagpipe. Some of these processes take a minute, some take hours, and some take a month or more to complete.
When someone asks me how long it takes to make a bagpipe I sometimes answer by telling them how many I have made in the last 12 months. At the time of writing this article I find that I have made 842 bagpipes during my 34 years of pipe making. That works out to an average of 24.7647 BPY (Bagpipes Per Year). How on earth did we manage to make that bagpipe at the Blowout in just one day?
Julian Goodacre October 2017
With many thanks to Dirk Dahmer for giving me permission to use his photos.
- Data Processing Notice (GDPR)
 @BagpipeSociety on X (formally known as Twitter)
 TheBagpipeSociety on Instagram
 BagpipeSociety on Facebook
Something wrong or missing from this page? Let us know!