![]()
Promoting the Bagpipe Revival since 1986
The Bagpipe Society
Tools of the Trade
Oval in 10 minutes – Making a Berrichonne Stock
The topic for Tools of the Trade is the jig I made for sanding the oval chanter stock for my Berrichonne Cornemuse.
The stock is oval in shape and has two parallel bores running through it. It is 120mm long for the G model and the challenge is to make the stock to a good and consistent shape. I hadn’t made one of these since setting up my own workshop so I had nothing in place to do the job. However I remembered that a few years ago I saw a sanding jig that a friend of mine had made to complete a similar task. The function of the jig is to clamp the stock blank between two oval templates, so it can be sanded to the right shape with a belt sander.
Using the old memory, I have recently rebuilt a jig and used it for the first time just a few weeks ago. As it was not that long ago, I can tell you all about the problems I had with the jig and how I went about the process.
I like to do things “on the job”, so I didn’t start with any sketches or plans, but with the table saw! I first of all cut the wood to size for the stock and then made the two parallel bores so the next task was putting it on a belt sander.
To use the jig, I needed a “working table” or platform that could be placed either side of the sanding belt ito rest the jig on. So I screwed on two aluminium angles at each side, a brought them level with the belt. Now I was able to figure out the final dimensions of the jig. The jig itself consists of the following parts:
- two oval templates out of phenolic paper
- four cylinders with an 6.3mm bore and stepped outside diameter. The smaller diameter needs to be slightly smaller than the bore of the stock, the bigger diameter should be just big enough that the stock- blank is securely clamped when the jig is screwed together.
- two pieces of threaded rod (M6)
- a few nuts for screwing the jig together
After preparing all those parts, I assembled the jig and gave it a try. You can see the result and the two aluminium angles in picture I.
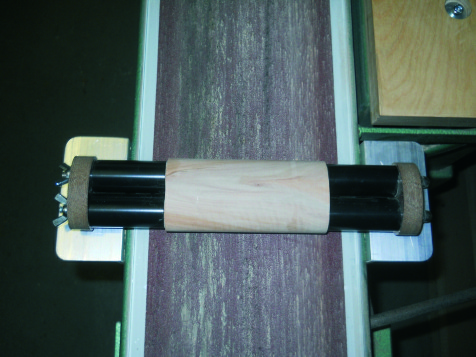
Fig 1
Having made my first stock, on close inspection I saw that I had to improve a few things. The first problem was created be the belt sander itself. I had bought it as a second hand machine and it had obviously been used a lot by the previous owner. This meant that the graphite pad which covered the platen of the sander had a lot of marks and low spots in it and left marks on the surface of the stock. Initially I thought I should simply replace the pad, but having removed the old one, I found that the platen itself was uneven as well. I then did a bit of research into finding an affordable straight and flat material and I eventually decided on a glass plate. I got one made to exactly the right measurements and I glued it on with silicon. (see picture II) The next thing to solve was how to make the two flat ends of the stock. I wanted to have a smart way to sand them so that they are smooth and stay at a ninety degree angle to all sides of the stock blank. Therefore I installed a table with an 90° fence, all made out of plywood, at the belt sander. (see picture III)
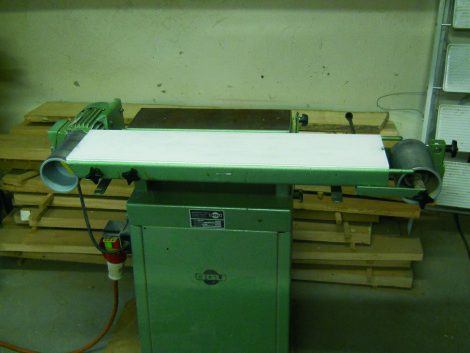
Fig 2
After I adjusted the fence carefully to the correct angle, there was one more thing to do to speed up the process. My belt sander has the opportunity to change the angle of the platen in relation to the working table I installed. It has a scale to adjust the angle, but to adjust it exactly to an 90° angle is relatively time consuming. So I installed a stop with a screw to make the fine adjustment (See pictures IV)
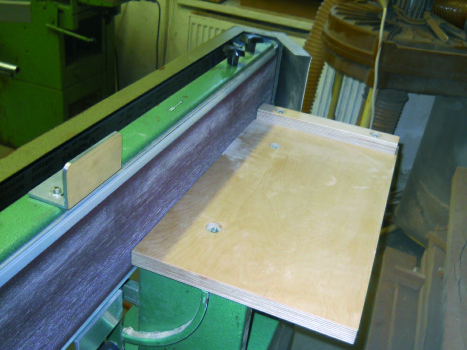
Fig 3
Now I was able to sand the flat sides of the stock. I inserted a cork washer at the end of each of the cylinders to avoid any marks on the stock from clamping the blank between the templates. (See picture V) So finally I was ready for a second try! Because I wanted to minimise that amount of hand sanding, I decided to sand it in two steps. So I clamped two pieces of 1mm thick plastic sheet at the aluminium angles and used an 120 grit belt to get rid of most of the material. Then I took off the plastic, changed the belt to 240 grit and finished the process. Just for fun, I used dull sanding belts and took the time. All in all, with changing belts, it took me 10 minutes to get the blank from square to oval and another 10 minutes to sand it up to 400 grit by hand. So the jig was a complete success and I am looking forward two adapt it to sand blocks for block mounted keys and maybe some more ideas will pop up.
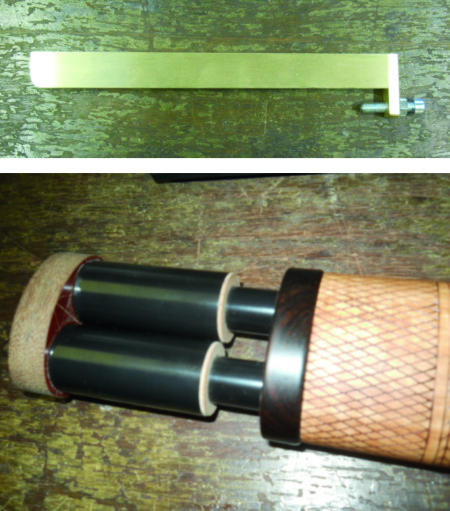
Figs 4 and 5
- Data Processing Notice (GDPR)
-
 @BagpipeSociety on X
(formally known as Twitter)
@BagpipeSociety on X
(formally known as Twitter)
-
 TheBagpipeSociety on
Instagram
TheBagpipeSociety on
Instagram
-
 BagpipeSociety on Facebook
Something wrong or missing from this page? Let us know!