![]()
Promoting the Bagpipe Revival since 1986
The Bagpipe Society
Tools of the Trade
In this short article, I’m going to tell you about the pewter inlaying technique I use to decorate the bohas I make. I learnt the technique from Bernard Desblancs, with whom I was lucky enough to learn my trade for eleven years. In the seventies Bernard learnt a lot - decoration included - from a Slovakian musician called Anton Vranka, as bohas share many characteristics with other single reed European bagpipes.
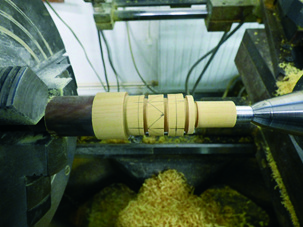
As picture 1 shows, once the wooden part is finished – here a blowpipe – I draw the chosen pattern, corresponding to the path molten pewter will follow, with a pencil.

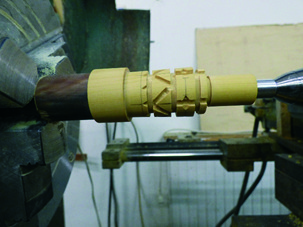
Next, (picture 2) the pattern is then carved out. The wood is then polished as one can’t work on it further, later in the process. Then I glue a soft cardboard tube around the part using a silicone sealant. The cardboard is then trimmed to perfectly fit the pattern. It‘s a long and painstaking task which must be done accurately. It allows, on the one hand, the wood to be protected from the heat of the molten pewter (which is over 200° C). Also, as boxwood is a light coloured wood, it is prone to blacken easily and the cardboard prevents any discolouration. Also, the cardboard adds some extra thickness that will result in a slight high-relief on the finished work (picture 3).
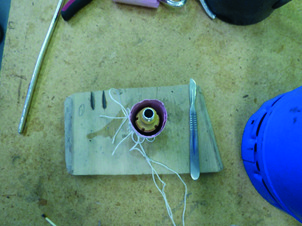
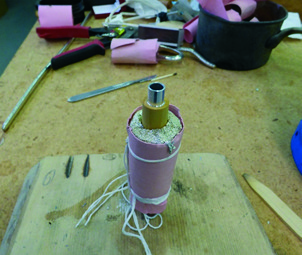
As in picture 4, all is now ready to pour the pewter. I melt it into a pan and pour it, in a single go, into the mould. In this example I have used a cardboard mould, which is held in place by string. The mould can also be made of wood, which will force the pewter to run deeper into the paths. One has to be very cautious with temperatures: if it is too cold, the pewter will not flow properly all the way through the tracks, thus creating gaps and holes in the finish. But if it is too hot, almost boiling, the pewter is likely to trap bubbles which can also create gaps and pits. It requires a lot of trial and error to really know when tin is ready to pour (picture 5).
The next stage (picture 6), is to put the part back onto the lathe in order to remove the excess metal. The excess is saved and can be used for later instruments. As the part is turned, (picture 7), the decorative pattern is revealed, as well as the pink cardboard shield. The emergence of the cardboard is the signal to stop removing the pewter. It is important not to remove the extra thickness of pewter so that the design can stand ‘proud’ of the wood.
Now I sand the pewter off with very fine grade sanding paper to get rid of possible minute machining traces. The cardboard continues to protect the wood from the pewter dust. Then, the cardboard and silicone is removed very carefully, and the pewter neatly trimmed and polished. The pewter is polished using a burnisher made from a small round tipped boxwood stick dipped into oil. The edges of the pattern are rubbed to give them shine and relief.
The final stage consists in turning the other end of the blowpipe which is made of horn (picture 8). Picture 9 shows the finished blowpipe. It will be left to soak into oil for twelve hours before being mounted onto the bag.

Many thanks to Jean-Louis Caussé for his translation. Thanks to Jane Moulder: I’m enchanted to be in Chanter.
Workshop COMDT (Centre Occitan des Musiques et Dances Traditionelles) www.comdt.org atelier@comdt.org.
Further thanks to Jane Moulder for her final linguistic “burnishing”. (JLC)
From Chanter Winter 2016.
- Data Processing Notice (GDPR)
-
 @BagpipeSociety on X
(formally known as Twitter)
@BagpipeSociety on X
(formally known as Twitter)
-
 TheBagpipeSociety on
Instagram
TheBagpipeSociety on
Instagram
-
 BagpipeSociety on Facebook
Something wrong or missing from this page? Let us know!