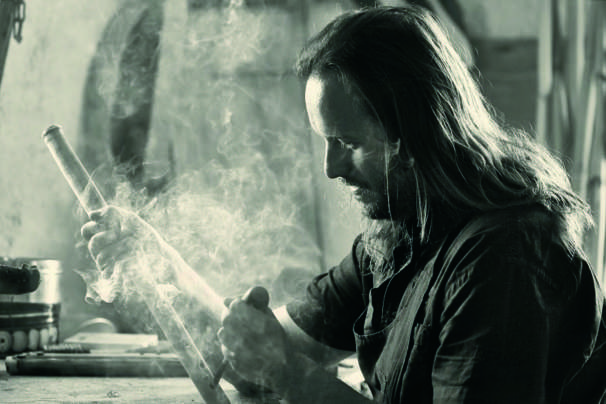
The workshop is like a micro cosmos of our planet: All the elements of nature exist in the workshop to serve a purpose … What purpose? To create … The need for creation gives birth to all that we confront and admire. The natural splendour … This universal macrocosm fits into a small workshop. All the elements of the Earth are present.. Water, Air and Earth materials and FIRE! We will see rotational and grammatical movements, electricity and chemicals. All together to witness the creation … in this case a musical instrument.
When constructing a musical instrument it is like waiting for a nymph to become a butterfly … and yet you cannot expect in any way to shorten time. In time it will be revealed. A musical instrument works like this. Sometimes it takes time to be revealed with all its decency. To serve its purpose, to create projects. And all this is a remarkable observation.
My love for the sound of the bagpipe led me to learn and construct musical instruments. When I went to buy my first tsabouna the truth is that I did not know what I was getting myself into. I had not even seen a single photo of one before. My reaction when I first saw it was to feeling that it was “out of this world”. I saw immediately that all the materials are completely natural and, of course, the smell does not leave my doubts about that!
The love for this, my new acquisition, was accompanied by my love of books and especially mythology. Through the tsabouna I discovered the myth with another perspective. Inside me I combined the sound you hear from these timeless stories. A perfectly natural sound that lured me to mountains and sea. Everywhere is the primordial sound of the past.
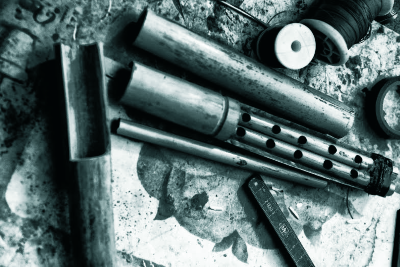
I decided to fabricate my own instruments only with natural materials given by mother earth. The main material used is the “Reed” which grows with great abundance in the Greek lands and is of excellent quality. With endless myths written about the reed and for its appearance. Even the shavings of the reed are useful. Bones or cane for the mouthpiece, cane and cow-horns for the chanter and the body of a complete goat skin for the bag.
The etymology of the word in Greek WORKSHOP- “Ergastirio” means Creation on Earth. In a musical instrument workshop all the hidden forces of creation help us to expand the our final purpose. To do what we love.
When I was at A Level college we had a talk from a production engineer. He talked about finding ways to solve interesting problems like drilling curved holes in turbine fins and joining dissimilar materials. I remember being fascinated but didn’t think to consider it as a degree option. I actually wound up as a post graduate genetic engineer which, though fascinating just wasn’t me. For one thing the maths was way too hard. I eventually ran off to industry and worked in research and development for ten or so years. That was better, but I guess I still wasn’t getting to make things. Maybe that’s why I started making pipes. The production engineer in me was always there but now it really had a purpose.
The last thing I want to do is turn the making of pipes in to a production line but there is a lot of satisfaction to be had from making tools and jigs that solve production problems. Sometimes to speed up the process but more often the object is to increase the accuracy and repeatability of a particular job. The case in point here is the drilling of finger holes.
Anyone who has bought a DIY instrument making kit knows the difficulty of trying to pin an instrument to the dining table with one hand whilst lining up a power drill in the other. It’s never going to end well. For some reason misaligned finger holes seem very obvious even when just a fraction out. Holes in the dining table are also hard to miss. All makers have a box of chanters that didn’t quite make the grade and finger hole mess-ups count for quite a high proportion of their contents.
One trick, apart from obviously using a drill press, is to drop a drill bit in to the first hole you drilled and use that to “eyeball” the rest. It works really well, if a little slow, until you start making smallpipes where the chanter is sometimes barely twice the diameter of the drill bit. I clearly needed a drill that was permanently in line with the centre of the chanter. The obvious thing was to have a drill that travelled up and down the lathe bed so the finger holes can be drilled whilst the chanter is on the lathe. Large engineering lathes can sometimes do this with an expensive gadget called a tool post grinder but I like to work on a wood lathe and I didn’t have much cash. As a result I went for, what is really quite the obvious solution. A power drill on a hobby size pillar drill stand that slides along the lathe bed. It has a tenon beneath to keep it in registration with the lathe bed and a sliding V block that is brought up from below to steady the instrument.
I’ve used the thing on every instrument I’ve made since I set it up, as well as various other projects. It was a real pain to line up and I’m still not convinced its right in the middle but it’s simple, accurate and repeatable.
Julian shares the secret of his favourite tuning tool:
What is the wisest course of action if you find that there is one note on your chanter which sounds a wee bit flat? One approach to any problem in life is to ignore it and hope it just goes away. With bagpipes this can lead you into the bad habit of trying to raise the note by squeezing a bit harder which can cause other tuning problems. There are several other ways of dealing with this problem. The wisest initial approach is probably to consult your Venerable Pipemaker, even though it might involve money passing hands. The flat note might be a result of the chanter bore contracting in which case he can re-ream it. Or it could be a peculiarity that your reed has developed, in which case a replacement reed might solve the problem.
If you are confident in the bore and the reed there are still other ways of raising the pitch of an individual note. Ideally the hole needs to be repositioned, either slightly higher on the chanter to create a shorter column of vibrating air, which raises the pitch of the note, or lower down to lengthen the column if the note sounds sharp. But this alters the outward appearance of the chanter and is a fairly drastic option that should only be considered in the very last resort. Makers have to do this many, many, times when initially developing, or making improvements to, a design of any type of woodwind instrument in order to arrive at the optimum positions for all the finger holes. Again, this is a job best left to your pipemaker.
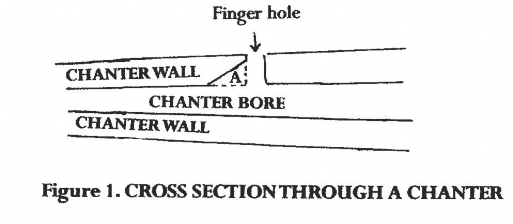
However there are two less radical ways which achieve the effect of shortening the column of vibrating air, thus raising the pitch of a single note, achievable by any keen ‘hands on’ piper. One is to increase the diameter of the
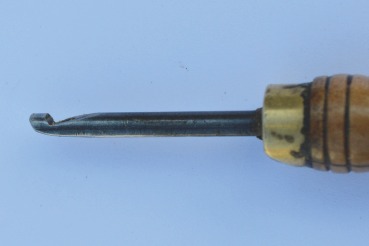
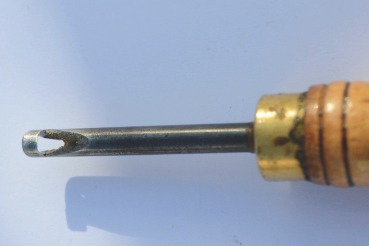
finger hole. The other technique is to undercut the hole. This involves removing a small piece of wood on the inside of the upper side of the finger hole. (A on Fig 1). It does not affect the outward appearance of the chanter, it is reversible, and I have designed a nifty little tool for this very purpose.
Undercutting appears simple, but in practice there remains the problem of swiftly, accurately and neatly removing a small piece of wood at the bottom of the finger hole without damaging its outside appearance. It is especially tricky on my narrow bored Leicestershire smallpipe chanter which has very small finger holes that leave little room to manoeuvre. I experimented with various knives for carving and also tried files and a Dremel drill, but all were hard to use, inefficient and could easily scuff or damage the visible outside of the fingerhole. Eventually I developed a simple cutting knife shaped somewhat like a crochet hook, which is easy to use, since you put it into the finger hole and pull it towards you at an angle. You can then accurately control how much wood to remove without damaging the surface diameter of the finger hole. I find it an invaluable tool and for reasons that I explain later I have immodestly named it ‘Goodacre’s Razor’.
I make these from roll pins, which are fixing devices used in light machinery to secure metal collars and pulleys onto shafts and they operate in a similar way as a nail does in wood. They are made from spring steel which is rolled into a tube with the seam left open which allows it some springiness so that it will stay securely in position when it is driven into a slightly undersize hole. They are available in a variety of diameters and I recommend buying the longest ones available. I bought some recently on the ALL-TOOLS-DIY Ebay shop. (Beware! There are also similar roll pins made like little Swiss rolls- these are useless for making a Goodacre’s Razor).
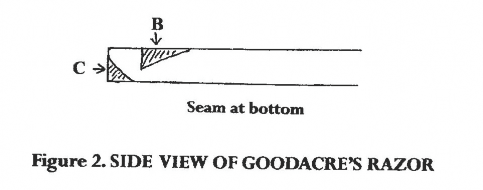
Even though they are made from hard spring steel it is still possible to file them with fine needle files. To start with you need to remove a triangle (B on Fig 2). when viewed from the side. Then round off some f the back heel (C on Fig 2). You should end up with something that resembles a tubular crochet hook. Now you can get a fine round needle file through the end and file the edge (Fig 2). from inside, so that the bevel of the knife edge is on the inside. Fine honing can be done with a small rolled- up screw of the finest wet and dry paper; mine hardly ever need re- sharpening.
Finally a handle is needed. You could just hold one in a pin vice, but it is more satisfactory to turn a nifty handle with the correct diameter hole in it, and epoxy the pin in place. Bingo! I made a series of these knives in different diameters, but in practice I nearly always use my 3/32 inch and 1/8 inch ones.
There is a historical reason why I named this tool Goodacre’s Razor. Since 1985 I have subscribed to FoMRHI- The Fellowship of Makers and Researchers of Historical Instruments. This admirable organization produces a journal as a forum for all instrument makers to publish and share their researches, tips, theories and anything relating to instrument making. Some of the articles published are very practical whereas others are analytical and theoretical. On a few occasions, debates between rival makers become tedious. About 25 years ago an increasingly heated exchange began between two string instrument makers about some aspect of their own esoteric obsessions. I forget the details; possibly they were clinging to their opposing opinions about the correct catlins for a Spanish vihuela. But I do recall it was the sort of subject liable to make any woodwind instrument maker yawn. The journal is published as a quarterly and it became increasingly frustrating to wait another 4 months to be faced with a further chapter of their disagreements which were of very little interest to most of the members; especially those who, like me, are more drawn to the nuts & bolts & glue type of articles.
At some stage one of these sparring makers introduced Occam’s Razor to support his personal argument. I had never heard of it, but apparently Occam was a 13th century philosopher who may, or may not, have stated that if there are two solutions to a problem the simplest is correct. This stirred up more hot air articles about the validity of Occam and his wretched Razor. I was fed up with all this theoretical clap trap filling up the journal and I cheekily wrote two articles.
One was a tongue-in-cheek inquiry asking where I could buy an Occam’s razor for scraping bagpipe reeds. The other article was my description of this undercutting tool and how to make it, which I ended by stating ‘Make some for yourself and think of Goodacre when you use yours. Without one I could not be held responsible for the temper of myself or my chanters’.
I am not advocating that every piper rushes out and makes a Goodacre’s Razor. Undercutting is a fairly radical process and this tool is really for an instrument maker or someone who enjoys gaining experience in tuning instruments. It is always best to think long and hard before removing any wood from your valuable chanter even though it is possible to reverse the effects of the process by building up the undercut area again with wax or filler.
Hopefully all your chanters are in tune and sounding sweet and you never have need of a Goodacre’s Razor!
As a German bagpipe maker, I live in a region where there is a tradition of playing double and single reed bagpipes. That’s how I came to be making Säckpipa!
You may not be aware, but the thickness of the wall of a chanter influences the tuning of the scale of a chanter. This fact creates some problems when it comes to making the scallops on a Säckpipa chanter. Sure, one could carve them. But if this method is used, it is quite hard to make them consistent and the same depth, resulting in each chanter needing a lot of adjustments to bring the scale into tune.
So, together with an old colleague, I searched for a way of getting the scallops to always be the same depth. Another consideration was to find a way of making them on a low budget! When I started bagpipe making I couldn’t afford to buy special machinery just for making the scallops.
From my point of view there are basically three possibilities of making scallops - Carving, routing and grinding. Carving has the problem I have already mentioned, using a router can tear up the grain of the wood and give a poor finish - so we came up with the idea of grinding . So the Scallop Grinding Jig was invented!
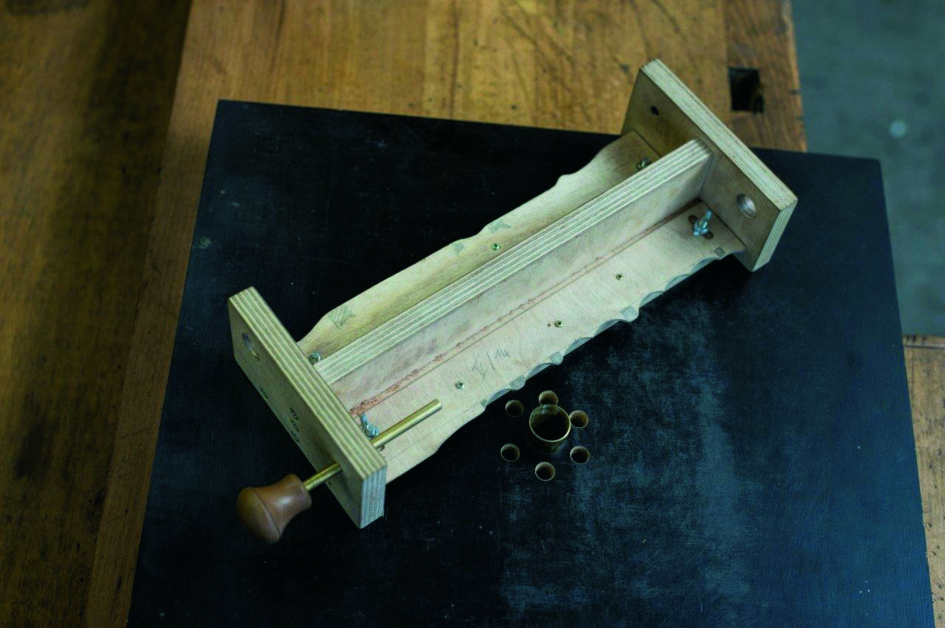
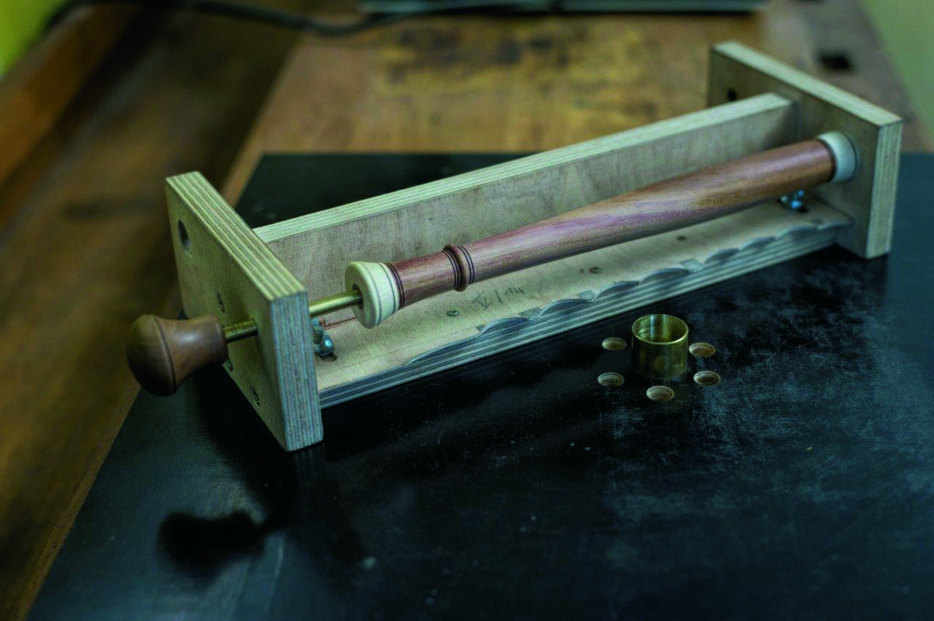
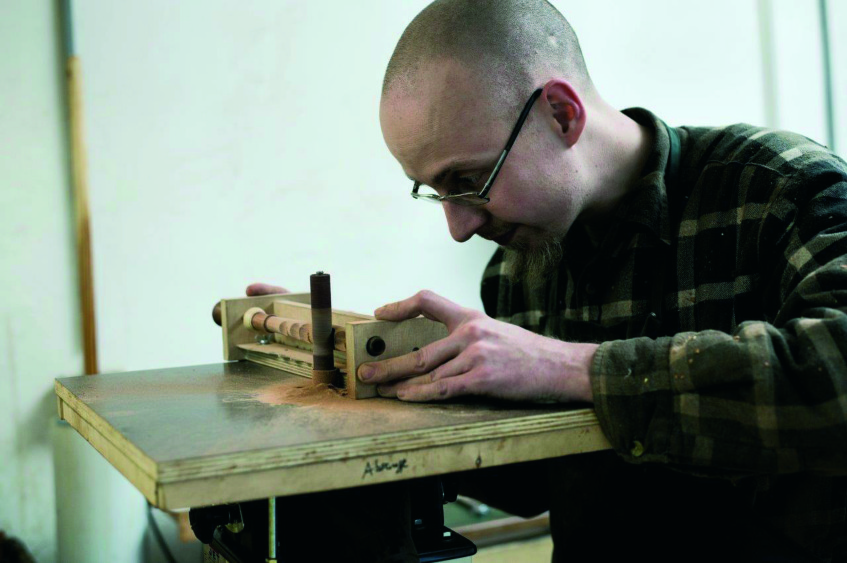
The principle is quite simple: You need a jig where you can secure the chanter and have some sort of template for to help create the scallops. For machinery, a drill press with a sanding drum would work, but as I already had an Oscillating Spindle Sander, we designed a jig that could be used with this machine.
First of all we made a plate that could be attached to the worktable of the sander. It is basically just some plywood you get at any hardware store, with a tube in the middle, going around the sanding drum.
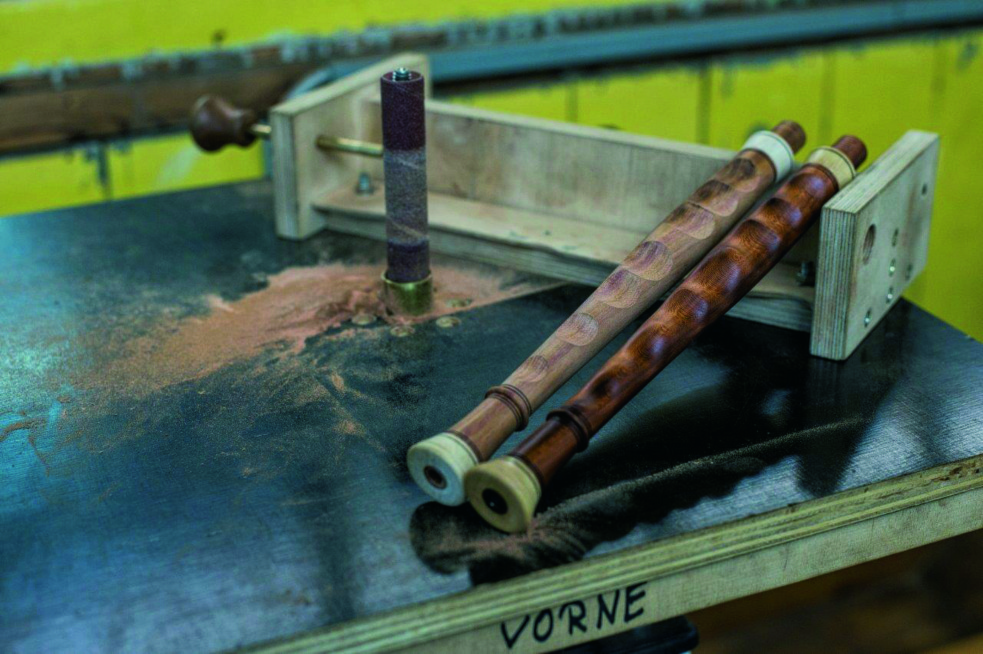
This tube is used as a stop for the grinding jig. The jig itself consists of a template for the scallops at the bottom of the jig, and at the
upper part a pin and a hole to set the chanter in. As there are scallops on both sides of the chanter, you need
two templates, one for the
front, one for the back.
The manufacturing process itself is quite easy: Put the chanter into the jig, switch on the sander and start grinding the scallops. The grinding process is finished when the template, which is attached to the bottom of the jig, touches the tube around the sanding drum. One of the advantages of this jig is also that you could use a prototype chanter as a template.
So, the jig is fairly simple but the result is that it makes the process of creating the scallops evenly and reliably much quicker, and once you have set up the jig initially, there is no need to do any more measuring or adjusting.
This edition is from our archives, so it is presented as scanned pages rather than text.
You may need to scroll to find the article you’re looking for.
This edition is from our archives, so it is presented as scanned pages rather than text.
You may need to scroll to find the article you’re looking for.